Friday, March 30, 2012

Rag Bag

Have you heard of a Swag Bag?  It's the goody bag full of overpriced fancy designer merchandise given to celebrities after red carpet events like the Oscars.  (The 2012 Oscars swag bag was valued at over $60,000... you can see what was in it here.)


My version isn't a Swag Bag, it's a Rag Bag.  And it has nothing to do with rags!  "Rag" is short for "Ragnar" -- which is a series of 200 mile running relays held all across the country.


This 1 minute video gives a good overview.  According to the Ragnar website:
Ragnar is the overnight running relay race that makes testing your limits a team sport. A team is made up of 6-12 individuals; each individual runs 3 legs. The legs of the race vary in difficulty and distance, from 2-11 miles, allowing elite and novice runners to run together. Over 2 days and 1 night, teams run across 200 miles of the country’s most scenic terrain. Pair that with crazy costumes, inside jokes, a great finish line party and unforgettable stories. Some call it a slumber party without sleep, pillows or deodorant. We call it Ragnar.
As a runner, I always seem to need more than sneakers.  There's my iPod, ear buds, phone, Garmin, protein bars, pre-race drinks, water, towels and a whole lot more.  I wanted to have a cute but durable bag to hold all of my running goodies.  I knew that Terri's Stuff Sack pattern would be perfect.


I chose denim fabric, since I run outside and this bag will spend a lot of time on pavement and grass.  I needed a dark, durable fabric.  I used pink as an accent to "girly it up" a little bit.  I struggled  with the piping, but I think that's because I used 1/4 inch cotton rope I found in my garage, rather than real piping cord.  It was a little too thick and stiff to sew around the circular base of the bag.  Next time, I'll definitely use the right materials!


I used Terri's measurements for the "large" stuff sack.  The circular base measures 8" across and my bag is about 10.5" high.


I added one pocket on the outside (complete with the Ragnar logo) and a row of pockets around the inside, to hold all my small items.  The main part of the bag will hold my water, small towel, reflective vest and lights (required for night running).  I also added a strap on the back for easy carrying, though I don't know that it was necessary and I'm not sure I'd add a strap the next time.


It's been a very long time (read: never) since I've made a project for myself, so I'm even more pleased to have tried this bag.  I think it's cute, it's incredibly practical and it's unique just for me.


~~~~~~~~~~~~~~~~~~~~~~~~~~~~~~~~~~~~~~~~~~~~

Linking up with: 
Crazy Mom Quilts for  "Finish it Up Friday" 


I'm looking forward to seeing what you've worked on this week!


~*~ May your day be full of Love and Ladybug Hugs ~*~

Monday, March 26, 2012

Tutorial: Sandwiching with T-Pins

I read this tip several years ago in a quilting magazine.  I would give credit if I could find the article again, but I can't locate it.  I am a pin baster and have tried several techniques for keeping my quilt sandwiches "flat" while pinning.  This one works best for me.

All you need (in addition to your fabrics, batting and safety pins) are a carpeted area and some metal " T " pins.

(Note that the instructions are first, then the photo.)

First, lay your backing fabric on the floor, face down.  Smooth out any wrinkles.


Next, secure the fabric into the carpet with a T-pin.  Place the pin at a slight angle so it really digs in to the the carpet (and any padding below).


Repeat down all sides of the backing fabric, with your T-pins about 18" apart.  Smooth the fabric as you go and re-position pins as necessary once they are all in place.


Once the backing fabric is securely pinned in place, lay the batting over the top.  Smooth flat.  Unpin one of the pins and replace, this time going through both layers (batting and backing).  Repeat for each pin, taking care to keep both layers flat as you go.


Once all the pins are re-secured through both layers, lay the quilt top over the batting (right side up) and repeat the pin replacement process.  This time, you'll be pinning through all 3 layers (top, batting, backing).


Let the Journey of a Thousand pins begin, as you pin baste through all your layers as usual.  


Once all your safety pins are in place, remove the T-Pins from around the edge of the quilt.  Gently lift your new quilt sandwich off the floor.  If any pins are too attached to the carpet (see photo below), you can unhook and re-pin that pin (minus the carpeting).  You'll get a feel for where the carpet it pretty quickly and I usually only get 1 or 2 of these "attached to the carpet" pins per quilt.


Quilt as desired.

~*~ May your day be full of Love and Ladybug Hugs ~*~

Friday, March 23, 2012

Friday Finish: Red Quilted Handbag

This was a crazy week at work and I haven't had time to post, but I did make progress on a few projects.  I managed to get this bag completed *and* take pictures outside in the sun.


I bought a pack of Fat Eights several years ago but wasn't sure what I'd do with them.  A few weeks ago, while trying to fall asleep, I became obsessed with finding them and making this bag.  Of course, it took me 3 days to find where I had them stashed.  Isn't that always the way?

I made up this pattern and the measurements.  The base of the bag measures 10" x 4" and is 9 1/2" tall.  (I measured my favorite purse and used that as my guideline.)  I added inside pockets on both sides and made a small zippered pouch to match the fabric that's on the bottom of the bag (but not shown in the pictures).


Here's a close-up shot of the flower I made, using this tutorial.  It was super easy and I think it adds a fun touch to the bag.


~~~~~~~~~~~~~~~~~~~~~~~~~~~~~~~~~~~~~~~~~~~~

Linking up with: 


I'm looking forward to seeing what you've worked on this week!


~*~ May your day be full of Love and Ladybug Hugs ~*~

Friday, March 16, 2012

Friday Finishes

I have a few finishes to share this week.  Two are mine, one belongs to my beautiful daughter, who is not old enough to have a blog of her own.


First, I posted my very first tutorial this week, on how to make an embroidered quilt tag.  I like to make these for every "personal" quilt I make (those I give to family and friends).  I've seen (and bookmarked and used) so many great tutorials online that I wanted to take a stab at one of my own.  I hope you enjoy it!  Here's a link to the tutorial for making a tag like this one:


Second, I completed the first of the monthly "Seasonal Skinnies" I plan to make.  Since it's March, I opted for a shamrock pattern for St. Patrick's Day.  This finishes at about 14" x 28" and I'm planning to make at least one each month this year, to correspond with a holiday.  I'm hoping to make a few others (such as the birthday cupcake and the ladybugs) which don't tie to any specific month.  The patterns are easy to follow and I used only scraps / stash.  I was in a bit of a hurry so I just quilted around each shamrock and then stitched in the ditch around the border.  I hope to do some FMQ on the background of my April Skinny (an Easter Egg).


Last but *certainly* not least....
I have two daughters, ages 5 and 8.  They are always asking if they can "help" me sew.  My little one likes to design mini quilts for her stuffed animals, or play with my scraps and strings.  My older one was really anxious to sew all by herself so I bought her a very basic machine to learn on.  I think my machine is a lot easier to use, but two sewers necessitates two machines, right?

First, I had her practice sewing straight lines.  Lots of straight lines.  When she felt comfortable with that, I let her choose some 5" squares from a box full I had.  She laid them out into 4 rows of 3 squares each and began to sew.  I did the ironing for her, but I taught her about ironing seams in opposite directions, pinning the rows together and when her top was done, sandwiching the quilt.  She helped pin baste all the layers together and quilted it with a "stitch in the ditch" method.  She even sewed on the binding (with some pinning help from me).  She's a little disappointed that not all her lines are straight, and I probably should have given her some thread that matched a little better (we used white for the whole thing), but I think this is a *speactacular* first quilt for an eight year old!


I wish I had taken some more photos along the way, but she's ready to make more projects (she wants to try a bag next) so I'll definitely make sure I use the camera more next time.

Oh.... if you haven't seen it yet, be sure to check out the Hands2Help Charity Quilt Challenge 2012 over at Confessions of a Fabric Addict!  You can link to the details here, or see my post about it here.

~~~~~~~~~~~~~~~~~~~~~~~~~~~~~~~~~~~~~~~~~~~~

Linking up with: 


I'm looking forward to seeing what you've worked on this week!


~*~ May your day be full of Love and Ladybug Hugs ~*~

Wednesday, March 14, 2012

Hands 2 Help Charity Quilt Challenge 2012

Over and over again I remind myself not to bite off more pieces of fabric than I can chew, but when I saw the "Hands2Help Charity Quilt Challenge 2012" on Sarah's Blog (Confessions of a Fabric Addict), I knew this was something I had to do.  


Sign-up for this Challenge runs from March 18-24 and quilts are due by June 8.  There are 2 great organizations to chose from and you may choose to make a quilt (or multiple quilts!) for one or both.


There will be giveaways and design help and "share your progress" check-in days.  There will be a chance to bust some of your stash.  There will be partners (if you'd like, but not required) to help challenge you along the way.  But bigger and better than all of that combined, times infinity, plus one, no trade backs.... there will be a tremendous opportunity to share your talent and your quilting love with someone who might need a big hug right about now, someone who has gone (or is going) through a tough time, someone who might smile for the first time in a long time when they receive the beautiful gift of your donated quilt.


Hop on over to Sarah's blog to read all about the Challenge, the dates and the charities.  She has a tab for "Hands2Help" with all the details, right under her header image.


Happy Quilting, everyone!


~*~ May your day be full of Love and Ladybug Hugs ~*~

Tuesday, March 13, 2012

Tutorial: Embroidered Quilt Tags

One of my favorite parts of the quilt making process is adding that final touch -- the quilt tag.  I think it adds such a personal touch to the quilt.  I've seen this done many different ways but my favorite method is to make a hand-embroidered tag.  I put together this little tutorial (my first!) to show how I make them.  Feel free to ask any questions in the Comments!


Apologies in advance that some of these pictures are a little dark.... I will work on my lighting and photography skills, I promise! :-)


Supplies required:
  • Small embroidery hoop
  • Embroidery floss in a color which contrasts your quilt tag fabric
  • Fabric for your quilt tag -- a few inches larger than your hoop
  • Fusible interfacing  -- a few inches larger than your hoop
  • Printer and printer-friendly foundation sheet paper -or- tissue paper and a pencil
  • Thin, sharp needle (for embroidery)
  • Scissors

Step 1: Design your quilt tag (words, images, etc) on your computer.  
I usually use Microsoft PowerPoint to design my tags, but Word (or something similar on a Mac, I'm not sure what the Apple options are) would work fine, too.  I like to use a font called "Brush Script" in font sizes between 18-24, but there are a lot of options, as well as more "masculine" fonts.  You'll want to pick a font with thin lines, which are easy to stitch over.  "Fat" letters don't work as well.  

Change the font color to something light, such as medium gray.  (This makes it easier to do the stitching later.)  Adjust your design / layout / font size to make the appropriate size quilt tag, but be careful not to make your lettering too small or it will be hard to stitch, especially when it comes to little loops and letters, like the top of a lower case "e."

This is the time to add any small graphics to your tag, such as the ladybug you see in the photos below.  You're looking for a good outline shape here, don't worry about the actual colors of the image.


Step 2: Print your design on a printer-safe, removable paper (if you have it).
I print my designs on June Taylor Stitch 'n Wash Dissolving Foundation Sheets.  Before I discovered these, I would print my design onto regular paper, then lay a sheet of white tissue paper over the top and carefully trace the words / design with a pencil.  Though not as "sturdy" as the foundation sheets, it's a good option if you don't have foundation sheet paper or if you would prefer to free-hand draw your words / design. 

This is what my printed sheet looks like.  I'll just stitch around the outside of that ladybug, so it's OK that the image I selected is colored in (versus just an outline of the shape).


Side note: A few years ago my daughters "designed" a quilted wall hanging for my sister as a Christmas gift.  My older daughter, who was 5 at the time, wrote her own "Merry Christmas Aunt Sarah" note and I traced / embroidered her lettering onto the quilt, so it looks as if she signed it in thread. I think this is a great options for aunts / uncles / grandparents as a gift "from the kids" even if mom or dad does the sewing.


Step 3: Iron fusible interfacing to the back of your quilt tag fabric.
I use Pellon Heavyweight Fusible, which I buy by the yard.  Any fusible will work, you just need something for stability.  Follow the manufacturer's instructions to fuse the stabilizer to the wrong side of your fabric.  If you don't have a fusible, that's OK... you'll just want to make sure everything is very carefully secured into your hoop in the next step.


Step 4: Layer your pieces together in the embroidery hoop and secure closed.
  1. On the bottom, start with the inside circle from your embroidery hoop
  2. Centered over the top of the hoop, place your tag fabric with the right side up (fusible side down).  If your stabilizer isn't fused on, lay that on top of the bottom hoop and cover it with the fabric. (Fabric should be right side up.)
  3. Your printed (or hand drawn) tag design, facing up
  4. The outer hoop from your embroidery hoop
These are obviously not centered over the bottom hoop, but this is the order they go in (as listed above).


You'll need to do some "feeling around" for where the bottom hoop is when you sandwich them all together, since it will be covered over by your other layers.  Keep everything flat on a table (don't try to pick it up and do this in mid-air, your layers will wrinkle) and take your time.  Adjust as needed before securing the top hoop over the other layers.  If the layers start to wrinkle or bunch up as you are securing the top hoop in place, you can gently pull them from the outside edges (outside the hoop) to smooth them out.  Be careful not to pull too hard, or you could rip the paper.
This is what your "sandwich" will look like once all the layers are secured in place.


Step 5: Trim the excess paper.
You don't want to trim the paper flush with the hoop, but removing the outside edges will make your "hoop sandwich" easier to work with.  


Step 6: Prepare your floss
Embroidery floss (I use DMC, but you could use any brand) typically comes in a skein made up of 6 thin threads twisted into 1 bigger strand of floss.  Cut a piece of floss approximately 24" long (this equates to about 2 "pulls" out of the wrapper).  Carefully separate out 1 single thread.  If you are doing a larger size font, you might want to use 2 strands so those letters appear more "bold" on the finished tag.  Knot one end and thread the other through your needle. 

If you look carefully, you'll see that my needle is "pointing" to the knot in the opposite end.


Step 7: Stitch
Starting from the back, begin stitching through all layers.  Come up from the back, then down through the front.  Use a back-stitch (or other preferred stitch) to carefully cover over your printed design.  This takes a little practice but you'll get the hang of it quick enough!


Come up from the bottom then go down again through the top.  Repeat.  (A lot.)

Here's how the back will look. Not as neat as counted cross stitch, but no one but you will ever see it.


When you come to the end of your thread,  carefully weave your needle (on the back side of the piece) under a few stitches and secure with a double knot around a few of the previous stitches. Re-thread your needle with another single strand of floss, knot the end and repeat the process until your stitching is complete.


Here's the back of mine when complete.


Step 8: Remove the hoop and paper
Once your stitching is complete, unfasten and remove the embroidery hoop.  


Carefully cut or tear away your paper from the lettering, being careful not to pull too hard on your stitches.  I keep my piece flat on a table and hold my fingers on the stitched lettering (to keep them from pulling or stretching) while using the other hand to gently tear away the paper.


Thank you to my dear husband for taking this photo!


The paper will be easiest to remove around the edges, but it gets a little trickier between the rows of stitching.  Here are a few tips for removing the paper between the letters:


Using small, sharp scissors, cut between the rows of stitching.  The smaller you can make your paper pieces, the easier they are to remove.  Just be careful not to cut through your stitches or your fabric!


For the stubborn pieces inside the letters, use a needle or pin to "poke and pull" the small pieces out.

Even though the paper I use is made to dissolve in water, I find that it doesn't always come out of the tiny loops and spaces between the letters, so I prefer to remove it all fully myself.  If this is too tedious, you could probably just attach the tag with the small pieces that remain, see what comes out in the wash and then remove what's left later.  


Step 9: Iron  & Finish
Once all the paper is removed, iron your fabric flat.  (No photo - y'all know what ironed fabric looks like!)


There are several options for finishing the edges of your quilt tag (see step 10).  Decide which option you'll use before you do any cutting!


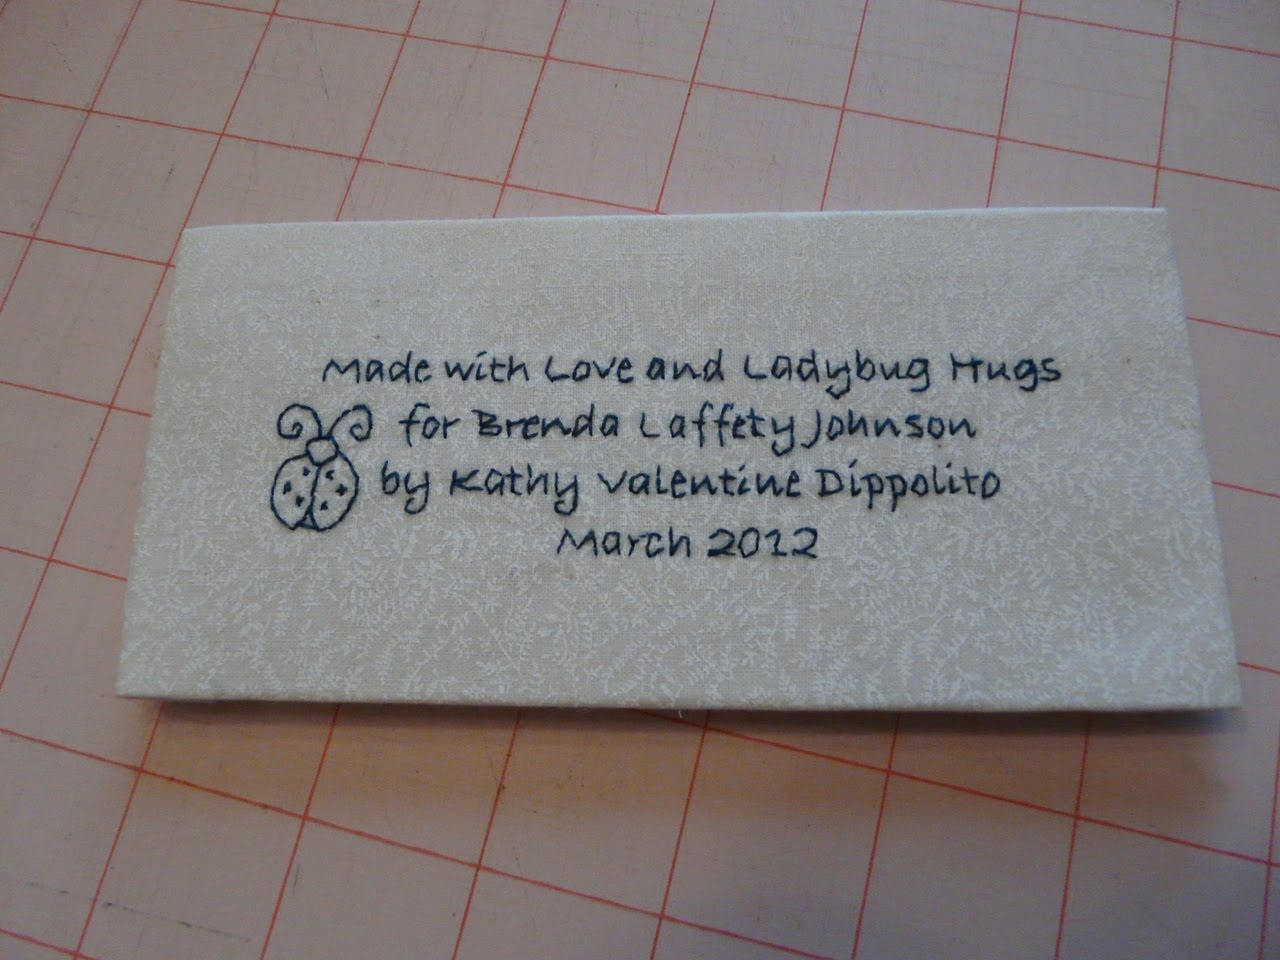
When you do cut, use your stitching as a guide.  In this case, I cut 1.25 inches around the lettering.  I used the bottom of the first row of words ("Made with Love and Ladybug Hugs") to line up my top cut.  I used the bottom of the last row of words ("March 2012") to line up my bottom cut.


Step 10 (below) shows various options for attaching this tag to your quilt.  For this particular quilt, I chose option 3, which is to hand sew this tag onto the quilt after the quilting is complete (and the quilt is washed and dried).  To hide the raw edges, I turned each side under 1/4 inch and ironed.


Optional step: Using a single thread and a knot in each corner, I tacked the edges to each other.  It doesn't look all that impressive now, but that helps keep the corners from popping out of place while I applique this down to the quilt.


Here's my finished quilt tag, ready to be sewn onto a quilt.  


Step 10: Attach to your quilt.
Option 1: Use a zig-zag stitch to "applique" around the edges of your quilt tag, attaching it to the quilt.  (I use a layer of Heat 'n Bond or other similar product to hold it in place.)  This is a great option to incorporate the words right into the design of the quilt.
This quilt is covered in appliques already, so the sun (which was otherwise just a plain yellow circle - per the pattern instructions) seemed a perfect spot to add the lettering.

Option 2: Sew the tag into your quilt as if it was a typical quilt block.  This example also shows how you can add other things -- like your child's hand prints -- to your embroidery.  Another fun option is for your child to write their name next to their hand print so you can stitch "their signature" onto your quilt.


Option 3: Turn (iron) the edges toward the back of the finished tag (like I showed in step 9) and stitch in place, either by hand or by machine.  (You may wish to use Heat 'n Bond here, as well.)   

This tag is hand stitched on.  You can see I used a "Disney" font for this one.

This tag is machine stitched on.


I'm sure there are other ways to attach the tag to the quilt, but these are the three I have tried. 


I'd love to hear your feedback on my first tutorial ever (!!!!!), or your ideas on how you make hand embroidered quilt tags.  Please leave a comment with your thoughts!


~*~ May your day be full of Love and Ladybug Hugs ~*~

Friday, March 9, 2012

Baby Megan's Whirlygiggles

Note to all the babies-to-be I know (or will soon meet): If you are born in the month of December, or even in early January, your baby quilt will be late.  Please plan accordingly.


I have just (finally!) finished a baby quilt for my first little niece, Megan.  She was born in mid-December but I was so buried in Christmas gift making, other projects and a broken hand (in a brace for a few weeks in January) that I'm just now finishing up her quilt.  I had the fabric well in advance and knew what colors I'd use, I just didn't make the time to put it all together.


I *so* badly wanted to take fabulous pictures of this outside in the beautiful South Florida sun but alas, 
it has been overcast and dreary here for 3 days.


As usual, I started with a pattern I liked (I used AmandaJean's Whirlygiggles - she has a great tutorial here) and then added a few things of my own.  Of course, I changed the measurements some (started with smaller blocks), cut some of the fabric upside down (Doh!) and ended up with fewer, smaller whirlies than I had planned.  Oh well... I still think it came out great and I will most definitely use my "backwards" whirlies for another project.


The white background fabric (with the flowers and ladybugs) is from a crib sheet.  Megan's mom (my sister-in-law) had this on her baby registry so I was pretty sure she'd like it!  I put Megan's name on the quilt with big appliqued letters and added an embroidered quilt tag with her birth stats.  


This was my very first time trying free motion quilting.  I am SOOO excited about it!  I clearly have a lot to learn in terms of FMQ patterns.... I went with a pattern I'm calling "seaweed" because I think it looks like those underwater plant tentacle thingies (yes, pretty sure that's the scientific name) you see on Finding Nemo.  (I'm actually hoping someone will tell me this is a real FMQ pattern and it has a real name.... that way I'll feel like I did FMQ the right way, even if it was only by accident!)


The FMQ made the quilt a little "stiffer" than I'm used to (I've only used stitch-in-the-ditch or other straight line quilting in the past), but I am in *love* with the "pucker" that the FMQ gave it after it was washed and dried.


~~~~~~~~~~~~~~~~~~~~~~~~~~~~~~~~~~~~~~~~~~~~

Linking up (for the very first time!) with: 


~*~ May your day be full of Love and Ladybug Hugs ~*~