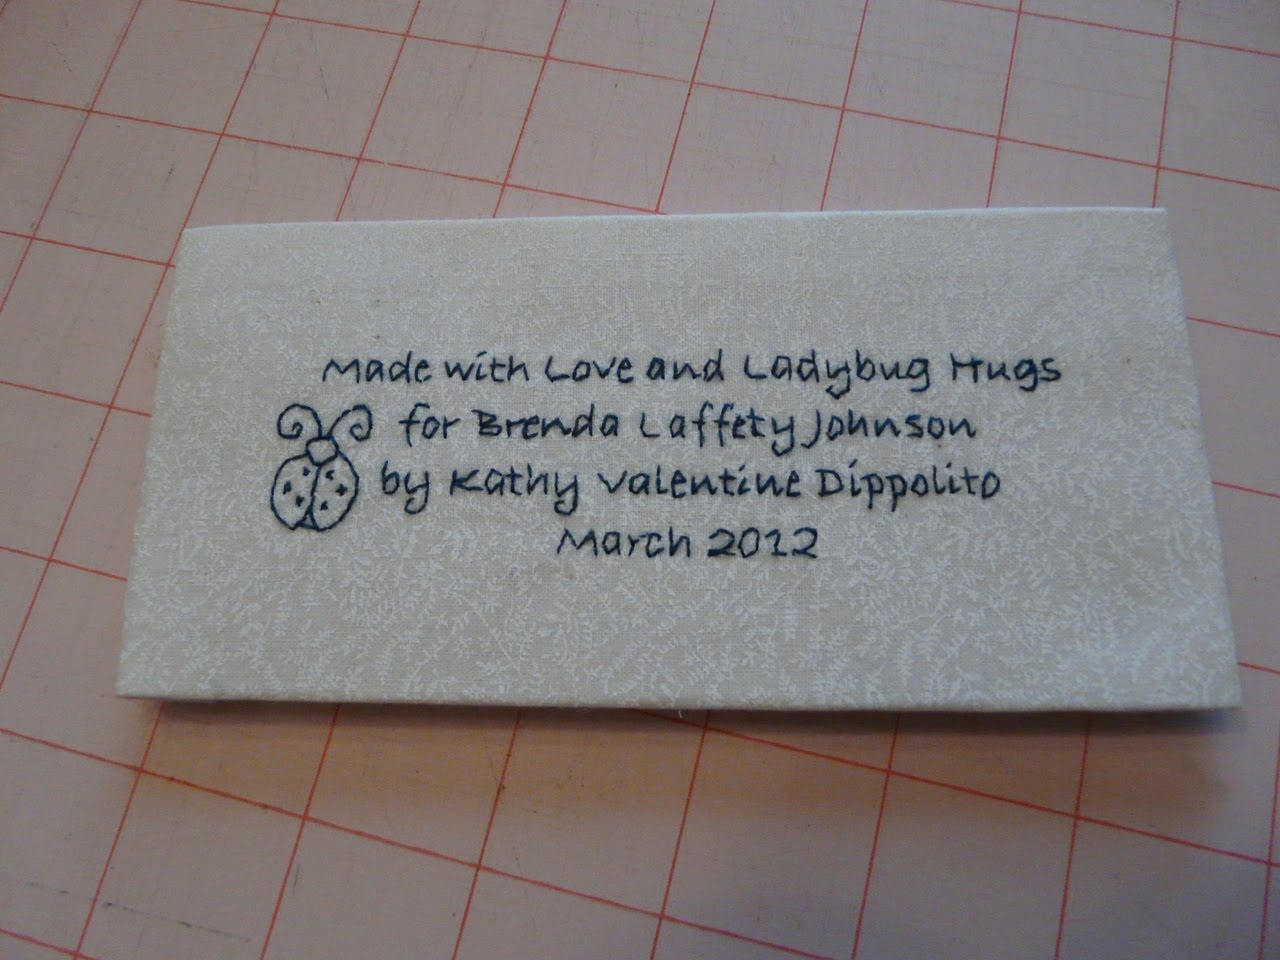
One of my favorite parts of the quilt making process is adding that final touch -- the quilt tag. I think it adds such a personal touch to the quilt. I've seen this done many different ways but my favorite method is to make a hand-embroidered tag. I put together this little tutorial (my first!) to show how I make them. Feel free to ask any questions in the Comments!
Apologies in advance that some of these pictures are a little dark.... I will work on my lighting and photography skills, I promise! :-)
Supplies required:
- Small embroidery hoop
- Embroidery floss in a color which contrasts your quilt tag fabric
- Fabric for your quilt tag -- a few inches larger than your hoop
- Fusible interfacing
-- a few inches larger than your hoop
- Printer and printer-friendly foundation sheet paper -or- tissue paper and a pencil
- Thin, sharp needle (for embroidery)
- Scissors
Step 1: Design your quilt tag (words, images, etc) on your computer.
I usually use Microsoft PowerPoint to design my tags, but Word (or something similar on a Mac, I'm not sure what the Apple options are) would work fine, too. I like to use a font called "Brush Script" in font sizes between 18-24, but there are a lot of options, as well as more "masculine" fonts. You'll want to pick a font with thin lines, which are easy to stitch over. "Fat" letters don't work as well.
Change the font color to something light, such as medium gray. (This makes it easier to do the stitching later.) Adjust your design / layout / font size to make the appropriate size quilt tag, but be careful not to make your lettering too small or it will be hard to stitch, especially when it comes to little loops and letters, like the top of a lower case "e."
This is the time to add any small graphics to your tag, such as the ladybug you see in the photos below. You're looking for a good outline shape here, don't worry about the actual colors of the image.
Step 2: Print your design on a printer-safe, removable paper (if you have it).
I print my designs on June Taylor Stitch 'n Wash Dissolving Foundation Sheets. Before I discovered these, I would print my design onto regular paper, then lay a sheet of white tissue paper over the top and carefully trace the words / design with a pencil. Though not as "sturdy" as the foundation sheets, it's a good option if you don't have foundation sheet paper or if you would prefer to free-hand draw your words / design.

This is what my printed sheet looks like. I'll just stitch around the outside of that ladybug, so it's OK that the image I selected is colored in (versus just an outline of the shape).
Side note: A few years ago my daughters "designed" a quilted wall hanging for my sister as a Christmas gift. My older daughter, who was 5 at the time, wrote her own "Merry Christmas Aunt Sarah" note and I traced / embroidered her lettering onto the quilt, so it looks as if she signed it in thread. I think this is a great options for aunts / uncles / grandparents as a gift "from the kids" even if mom or dad does the sewing.
Step 3: Iron fusible interfacing to the back of your quilt tag fabric.
I use Pellon Heavyweight Fusible, which I buy by the yard. Any fusible will work, you just need something for stability. Follow the manufacturer's instructions to fuse the stabilizer to the wrong side of your fabric. If you don't have a fusible, that's OK... you'll just want to make sure everything is very carefully secured into your hoop in the next step.
Step 4: Layer your pieces together in the embroidery hoop and secure closed.
- On the bottom, start with the inside circle from your embroidery hoop
- Centered over the top of the hoop, place your tag fabric with the right side up (fusible side down). If your stabilizer isn't fused on, lay that on top of the bottom hoop and cover it with the fabric. (Fabric should be right side up.)
- Your printed (or hand drawn) tag design, facing up
- The outer hoop from your embroidery hoop
These are obviously not centered over the bottom hoop, but this is the order they go in (as listed above).
You'll need to do some "feeling around" for where the bottom hoop is when you sandwich them all together, since it will be covered over by your other layers. Keep everything flat on a table (don't try to pick it up and do this in mid-air, your layers will wrinkle) and take your time. Adjust as needed before securing the top hoop over the other layers. If the layers start to wrinkle or bunch up as you are securing the top hoop in place, you can gently pull them from the outside edges (outside the hoop) to smooth them out. Be careful not to pull too hard, or you could rip the paper.
This is what your "sandwich" will look like once all the layers are secured in place.
Step 5: Trim the excess paper.
You don't want to trim the paper flush with the hoop, but removing the outside edges will make your "hoop sandwich" easier to work with.
Step 6: Prepare your floss
Embroidery floss (I use DMC, but you could use any brand) typically comes in a skein made up of 6 thin threads twisted into 1 bigger strand of floss. Cut a piece of floss approximately 24" long (this equates to about 2 "pulls" out of the wrapper). Carefully separate out 1 single thread. If you are doing a larger size font, you might want to use 2 strands so those letters appear more "bold" on the finished tag. Knot one end and thread the other through your needle.
If you look carefully, you'll see that my needle is "pointing" to the knot in the opposite end.
Step 7: Stitch
Starting from the back, begin stitching through all layers. Come up from the back, then down through the front. Use a back-stitch (or other preferred stitch) to carefully cover over your printed design. This takes a little practice but you'll get the hang of it quick enough!
Come up from the bottom then go down again through the top. Repeat. (A lot.)
Here's how the back will look. Not as neat as counted cross stitch, but no one but you will ever see it.
When you come to the end of your thread, carefully weave your needle (on the back side of the piece) under a few stitches and secure with a double knot around a few of the previous stitches. Re-thread your needle with another single strand of floss, knot the end and repeat the process until your stitching is complete.
Here's the back of mine when complete.
Step 8: Remove the hoop and paper
Once your stitching is complete, unfasten and remove the embroidery hoop.
Carefully cut or tear away your paper from the lettering, being careful not to pull too hard on your stitches. I keep my piece flat on a table and hold my fingers on the stitched lettering (to keep them from pulling or stretching) while using the other hand to gently tear away the paper.
Thank you to my dear husband for taking this photo!
The paper will be easiest to remove around the edges, but it gets a little trickier between the rows of stitching. Here are a few tips for removing the paper between the letters:
Using small, sharp scissors, cut between the rows of stitching. The smaller you can make your paper pieces, the easier they are to remove. Just be careful not to cut through your stitches or your fabric!
For the stubborn pieces inside the letters, use a needle or pin to "poke and pull" the small pieces out.
Even though the paper I use is made to dissolve in water, I find that it doesn't always come out of the tiny loops and spaces between the letters, so I prefer to remove it all fully myself. If this is too tedious, you could probably just attach the tag with the small pieces that remain, see what comes out in the wash and then remove what's left later.
Step 9: Iron & Finish
Once all the paper is removed, iron your fabric flat. (No photo - y'all know what ironed fabric looks like!)
There are several options for finishing the edges of your quilt tag (see step 10). Decide which option you'll use before you do any cutting!
When you do cut, use your stitching as a guide. In this case, I cut 1.25 inches around the lettering. I used the bottom of the first row of words ("Made with Love and Ladybug Hugs") to line up my top cut. I used the bottom of the last row of words ("March 2012") to line up my bottom cut.
Step 10 (below) shows various options for attaching this tag to your quilt. For this particular quilt, I chose option 3, which is to hand sew this tag onto the quilt after the quilting is complete (and the quilt is washed and dried). To hide the raw edges, I turned each side under 1/4 inch and ironed.
Optional step: Using a single thread and a knot in each corner, I tacked the edges to each other. It doesn't look all that impressive now, but that helps keep the corners from popping out of place while I applique this down to the quilt.
Here's my finished quilt tag, ready to be sewn onto a quilt.
Step 10: Attach to your quilt.
Option 1: Use a zig-zag stitch to "applique" around the edges of your quilt tag, attaching it to the quilt. (I use a layer of Heat 'n Bond or other similar product to hold it in place.) This is a great option to incorporate the words right into the design of the quilt.
This quilt is covered in appliques already, so the sun (which was otherwise just a plain yellow circle - per the pattern instructions) seemed a perfect spot to add the lettering.
Option 2: Sew the tag into your quilt as if it was a typical quilt block. This example also shows how you can add other things -- like your child's hand prints -- to your embroidery. Another fun option is for your child to write their name next to their hand print so you can stitch "their signature" onto your quilt.
Option 3: Turn (iron) the edges toward the back of the finished tag (like I showed in step 9) and stitch in place, either by hand or by machine. (You may wish to use Heat 'n Bond here, as well.)
This tag is hand stitched on. You can see I used a "Disney" font for this one.
This tag is machine stitched on.
I'm sure there are other ways to attach the tag to the quilt, but these are the three I have tried.
I'd love to hear your feedback on my first tutorial ever (!!!!!), or your ideas on how you make hand embroidered quilt tags. Please leave a comment with your thoughts!
~*~ May your day be full of Love and Ladybug Hugs ~*~


 First, I had her practice sewing straight lines. Lots of straight lines. When she felt comfortable with that, I let her choose some 5" squares from a box full I had. She laid them out into 4 rows of 3 squares each and began to sew. I did the ironing for her, but I taught her about ironing seams in opposite directions, pinning the rows together and when her top was done, sandwiching the quilt. She helped pin baste all the layers together and quilted it with a "stitch in the ditch" method. She even sewed on the binding (with some pinning help from me). She's a little disappointed that not all her lines are straight, and I probably should have given her some thread that matched a little better (we used white for the whole thing), but I think this is a *speactacular* first quilt for an eight year old!